Installing Wheel Studs

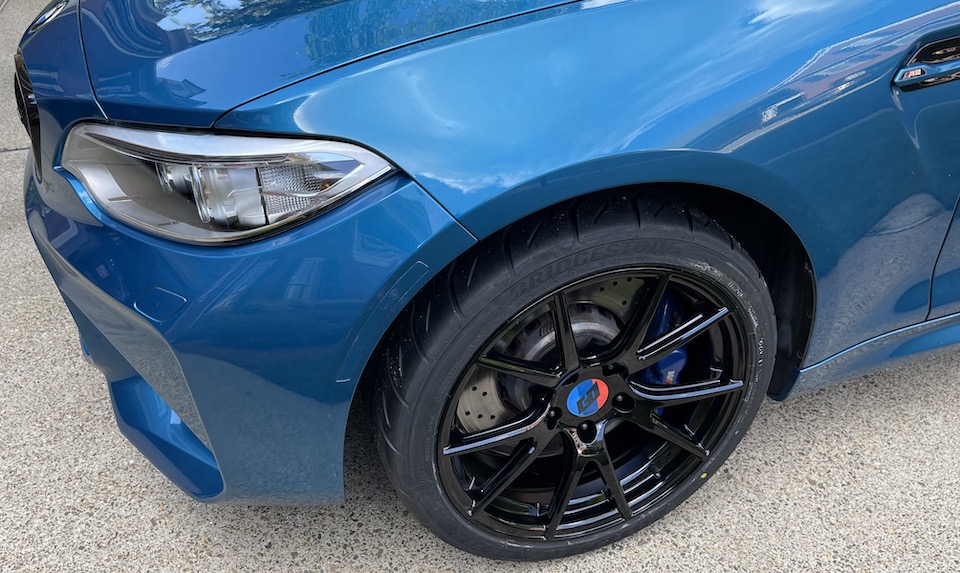
When I ordered the square set of Bimmerworld TA5R wheels for use when taking my M2 to the track, I also ordered a 73mm premium wheel stud kit to make changing the wheels a bit easier. The studs mount into the wheels where you would normal thread the lug nuts. The advantage at the track is the studs hold the wheel in place while you tighten down the nuts. This is very helpful when you are working on your car by yourself in the paddock.

Here are the tools I needed for installing the wheel studs:

  1. Adjustable Wrench
  2. Toque Wrench
  3. 17mm Deep Socket
  4. 22mm Deep Socket
  5. Brake Cleaner
  6. Wire brush
  7. Compressed Air

I have never done this before so like most things, I looked for a YouTube video to help guide me through this for the first time. I found a great video by AutoPilot that shows how to install the studs.

Here are a few tips for installing wheel studs:

  1. When I removed the OEM wheels, I sprayed the lug nut holes with brake cleaner and while that soaked in, I took the opportunity to wash each wheel.
  2. The video recommends a wire brush to clean the treads. I went into my gun cleaning kit and found a wire barrel brush that would go all the way into the treads and back out to get them good and clean.
  3. I then blew out each tread with compressed air and while they dried out I removed the next wheel.
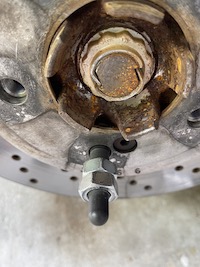
  4. The loctite that is on the studs will give you a false sense of tightness when handing tightening each stud. After I got the studs as tight as I could by hand I put on the two nuts and tightened those together. Then used the torque wrench on the outside nut to finish threading the stud until the nut slipped a bit. Then I used the double nut technique to torque the stud to the 75ft/lbs recommended by Bimmerworld.
  5. Be careful reversing the double nut as it is easy to loosen the stud that you just torqued down.

Being new to this, I am always impressed with myself when I put the car back on the ground, go for a test drive and everything still works!

TPMS Sucks

At my first track weekend, I learned the hard way that the Tire Pressure Monitoring System in my M2 sucks.

I started the day at the recommended PSI in my OEM tires and by the end of my first session I was getting a warning from my car about the pressure being too high. This was a minor distraction while on the track as is any warning your car throws at you while driving hard.

For the next session, I reduced the pressure before heading out on the track and things went from bad to worse. Now I was getting the low pressure warning which also forced the car back into comfort mode, not something you want when mid-corner on a race track!

Why a M car doesn’t have a track mode that disables all the electronic nanny’s is beyond me. BMW does let you reset the TPMS system pretty easily:

After a reset you can get the car back into sport or sport+ mode, but if you haven’t built up enough pressure by the end of the reset it will put you back into “limp mode.” Or if you keep the pressure up enough not to throw a warning for low pressure then you will get the high pressure warning by the end of a session.

The sweet spot for starting PSI is a moving target as altitude, track temperature and driving conditions all impact how much pressure builds up during a session. I decided I didn’t want to deal with this again for my next track weekend so I had the TPMS coded out of my car.

For a couple hundred dollars I got Code My Car to remove the TPMS feature from my BMW M2 and code in a few other features that I couldn’t do myself with BimmerCode. One of the upgrades I got coded in while removing the TPMS was the European programming for the traction control system. This makes Sport & Sport+ modes a bit more aggressive than the US version.

I am looking forward to my next track session and not having to fight the TPMS warnings all weekend.

M2 Brake Line & Fluid Upgrade

After reading a ton of posts on BimmerPost about brake fluid and brake lines for getting the most out of the M2 on a race track I decided to swap out the OEM before my first track day.

There are tons of options for stainless steel brake lines.

For me the deciding factor came down to color. In addition to being highly rated the Turner Motorsport stainless brake lines come in a blue color that is a close match to my M2. This may seem like a silly way to make a decision but with plenty of great choices that are similar in cost, why not pick ones that look good with your car, even if no one may ever see them!

I found this video the most helpful when trying to learn how to change the lines and bleed the brakes in my M2.

It is never as easy as it looks on YouTube. Here are a couple of tips that the video doesn’t show:

  1. Spray each brake line connection and mounting clip with PB Blaster to help loosen them up.

  2. The clip is a pain to get out. I found that inserting a small flat head screw driver into the hole in the clip and prying up helped get it out.

  3. After the new line was in and I bled the fluid, I would test the brake pedal by pumping it a few times with my hand (since the car was on jacks) to make sure the travel was still firm. I repeated this after bleeding each brake.

Using a Power Bleeder made this an easy one man job. I added a full quart of Castrol SPF to the power bleeder and flushed the existing fluid out of the system. My fluid was new as the dealer serviced the system recently. If your brake fluid is used it easy to see the color change when the new fluid starts to bleed into the catch can. I used the empty SPF bottle to measure how much brake fluid I was pulling out at each corner to be sure I got new fluid in each line.

Once I was done and put the wheels back on I tested the brakes. First just letting the car roll in my garage, then down my driveway and finally around my neighborhood to make sure everything was in good working order before using the car at speed.