The Best Track Day Performance Upgrade
Spending $1000 on your car can be fun when it means adding some power or improving the handling. When you are considering spending that on safety equipment it just isn’t very exciting. After fighting G forces at Roebling Road Raceway in a couple of the high speed corners I decided it was time for a harness system and HANS device.
Schroth Quick Fit Pro Harness
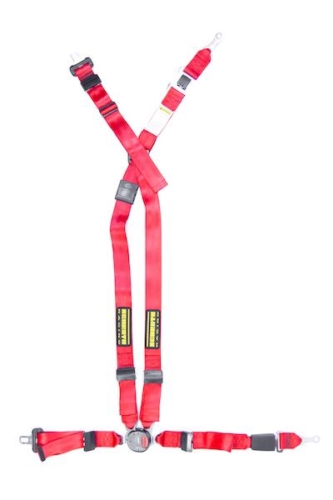
After doing a ton of research and reading on the forums I settled on the Schroth Quick Fit Pro harness system. Schroth doesn’t make the harnesses for the M2 but the system for E90 BMWs fits the car without any serious modifications. Since I use the M2 as a daily driver, the big benefit of the Quick Fit Pro system is that it is easy to take in and out of the car. All that remain in the car are a couple of anchor points.
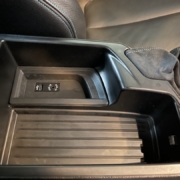
Installing the anchors in the back seat is super simple. Just pop the rear seat bench out, unbolt the existing seatbelt anchor point, add the harness anchor, bolt both back into the car, feed the harness anchors up from behind the bench and snap it back into place.
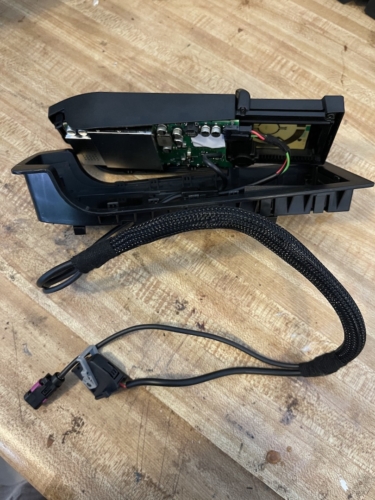
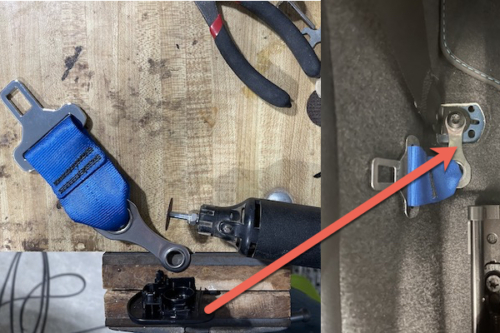 The anchors for the front seat require a bit of modification to the car. There are plastic covers that snap over the OEM seatbelt anchors. I managed to break the posts that snap these into place on both sides of the car when I pried them off. It doesn’t really matter as they won’t snap back in once the harness anchor points are installed. I also had to grind down one edge of the cover so the anchor could come out under the cover. I wrapped a rubber band around lip of the cover to help it grip the carpet so the cover would stay in place since the posts no longer reach the holes to snap back into place. So far the covers have stayed in place, even at the track.
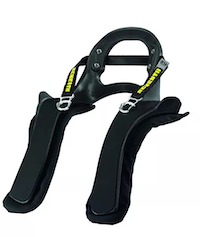
Schroth Super Sport HANS Device
Since I was using the Schroth harness system I went with a Schroth Super Sport HANS device. It works nicely with the harness straps and was priced competitively. It also came with the mounting brackets for my helmet so no nickel and dime fees for all the parts you need to make this work.
Not knowing much about this, I quickly figured out that the degree associated with HANS devices has to do with the seating position in your car. 20 degrees is what people need for an upright seating position like a street car. I also learned that the size has to do with your neck size. Think dress shirt sizing and that will help you pick the right size for you.
What Makes A Harness & HANS The Best Performance Upgrade?
As I mentioned in the opening paragraph, at Roebling Road Raceway I was fighting the G-Forces on the car to hold my self in place. With the harness and the HANS device I am now anchored to the car. I don’t have to hang on the wheel for dear life and can concentrate on driving. I also have a better feel of what is going on with the car, allowing me to make minor adjustments and improving lap times.
In my journey so far, this is the best money I have spent on any type of parts for my car.
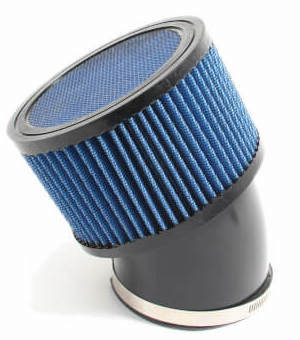 The Dinan cold air intake re-uses the bottom half of the OEM air intake box and replaces the OEM filter with
 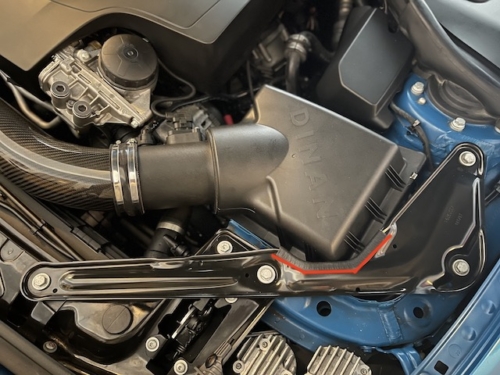 In the M2 or in a convertible 2 series there is some extra bracing that needs to be cut so the Dinan air filter box cover will fit into place. The install kit comes with a rubber gasket to finish off the cut edge of the brace which I highlighted in red in the image. The instructions are pretty straight forward on where to make the cut. I marked the brace with some blue painters tape to give me a nice straight edge to follow. A grinder with a metal cutting wheel made quick work of this and I used a fine grit sandpaper to clean up the edges before putting on the gasket.